Whether you are a budding Youtuber working on vlogging laptop or amateur artist trying hands on editing videos, you always get need to trim videos while working on videos.
There are profession video editing tools out there to do heavy video editing.
But for a simple task of trimming videos on Windows 10, buying expensive video editing tools is overkill.
Moreover even installing free video editors to trim videos is not worth spending time on when you can cut videos without installing third party tools.
Step by Step Guide to Trim Video
1. Double click on video that you want to trim. Windows 10 will open it in default video player i.e. Movies and TV apps.
2. Click on Edit in Photos button on bottom right corner.

3. It will open up a menu. Click on Trim option.

4. This will open video in Photos application. You will see two slider option at the start and end of video tracker.
5. Just move start slider to time from where you want to cut video.
6. Move end slider to time where you want to end trimming. As you move slider, app will display total video time of trim video.
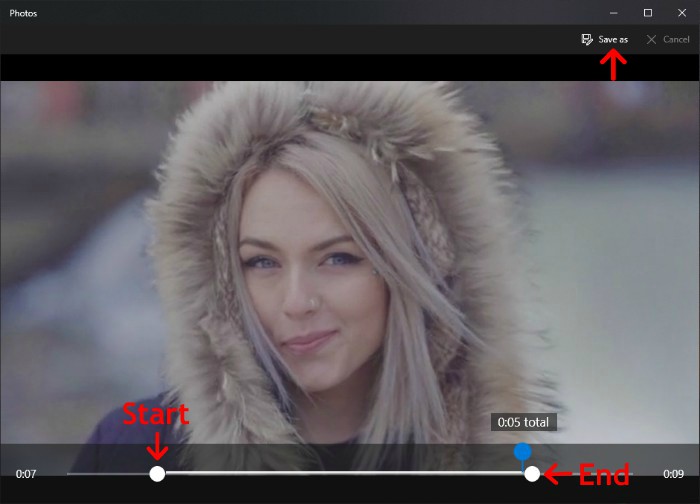
7. After selecting trimming position, click on Save as button on top right corner or press Ctrl + s keyboard shortcut.
8. This will trim video and prompt to save cut video with a default file name in same folder where original video is stored.
9. Change file name and saving folder if you want and save video. Video will be saved in mp4 format.
People looking for alternate method to cut videos, can use VLC media player to trim video.

